Authenticating
Single External Provider
Once the JWT is accepted, a new identity will be added to the ZDEW. Initially, the identity will not be authorized and a new icon will show up indicating the user needs to authorize via the external provider. If a single external provider is configured for this OpenZiti overlay network, clicking the icon will being the Auth Flow with PKCE process. During this time, the ZDEW will be listening on port 20314.
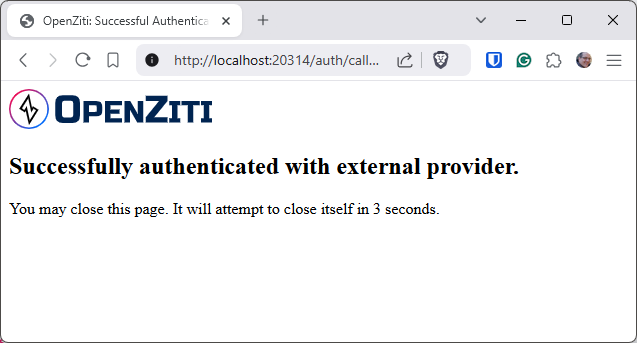
After successfully completing the authentication with the external provider, the browser will redirect to the listening port and complete the authentication flow. The user will be shown a screen that looks similar to this. The first time this screen is shown in a browser session, it will not automatically close. Subsequent authentication events should result in the tab automatically closing.
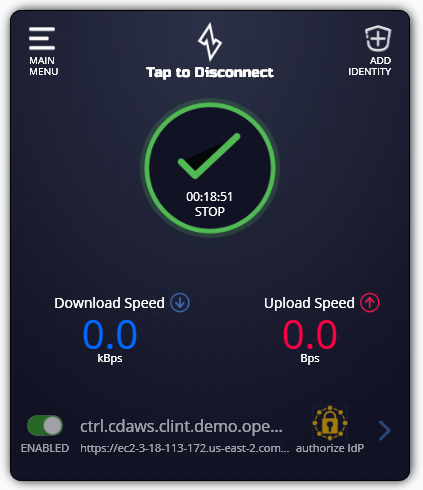
Assuming everything succeeds, the user will see the normal information shown by an authenticated identity.

More Than One External Provider
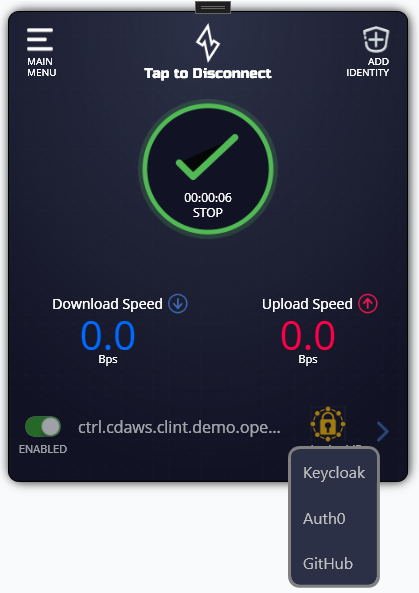
If your network is configured with more than one external provider, a popup will be shown when clicking on the "authorize IdP" icon. The popup will contain a list of the providers to select from. Choosing a provider from the list will begin the authorization flow for the selected provider.
Saving a Default Provider
When using external providers, it's likely users will want to assign a provider as a default. Before authenticating, click on the detail entry for the given identity a default should be assigned to. A new screen will appear looking like the image shown below.
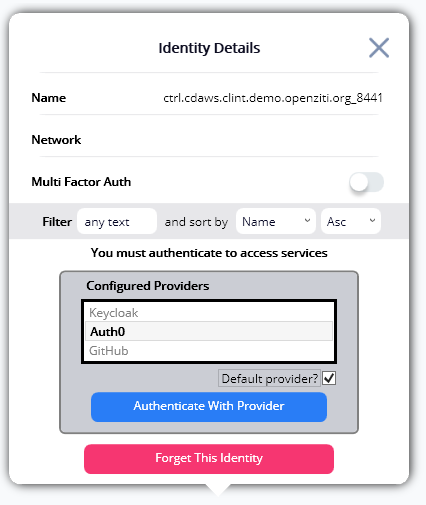
To assign a default provider, click the desired provider and click the "Default provider?" checkbox. The UI will remember the setting when it is clicked. There is no need to 'save' this setting. When a default provider is selected on a network with multiple providers, no popup will be shown when clicking the "authorize IdP" icon.
Saving a Default Provider When Authenticated
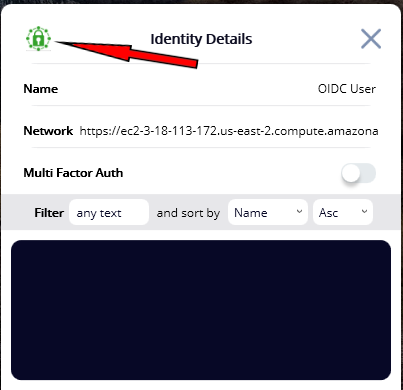
If already authenticated, clicking on the Identity Detail page will show the services assigned and accessible to the user. The default provider selection screen can be accessed by clicking the green oidc icon in the top left, shown below. This icon will toggle between default provider selection and service view.
Resetting a Default Provider
To reset the default provider simply uncheck the "Default provider" checkbox. When first opening the identity details page, the default provider will be automatically selected. If another provider is highlighted, choose the default provider and uncheck the "Default provider" box. There is no need to 'save' this setting, the values is stored immediately.
Non-Default Provider
If a default provider has been selected, users may still elect to authenticate with a different provider. To use a different provider than the default, open the identity details page and select the provider to authenticate with. Once selected, click "Authenticate With Provider" and the selected provider will be used to authenticate.